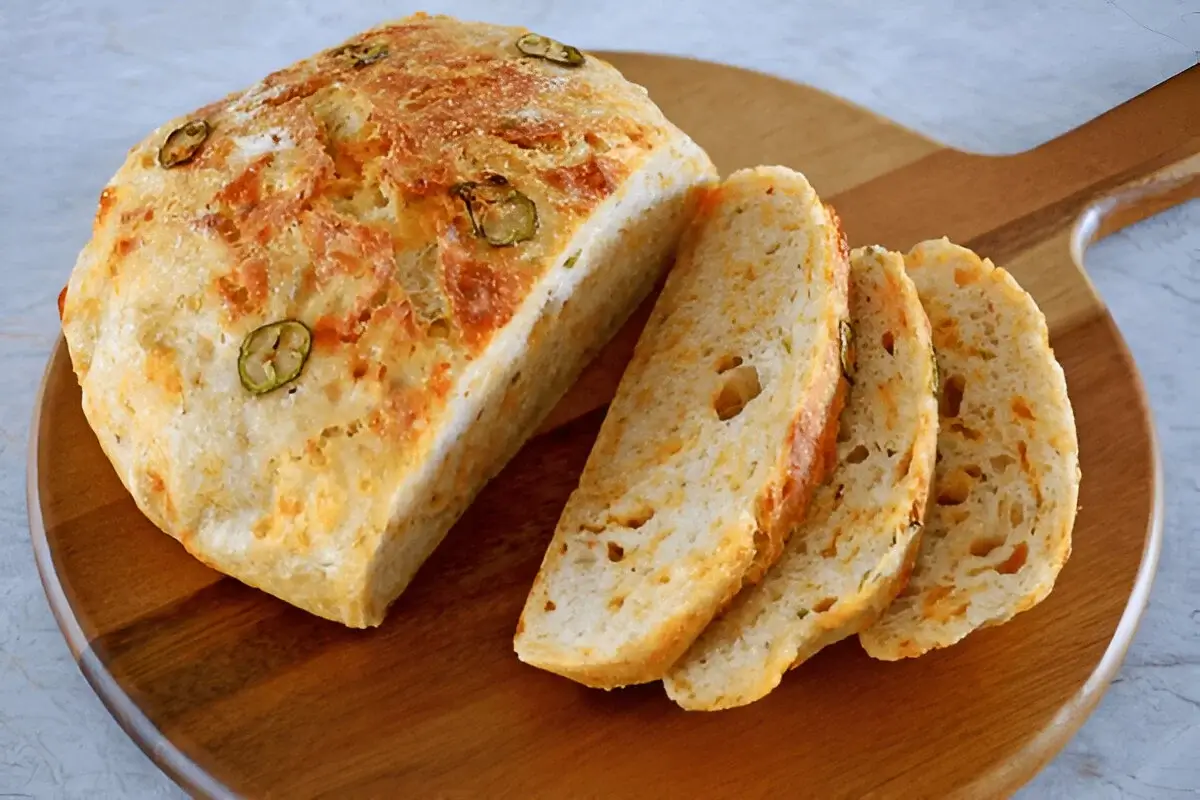
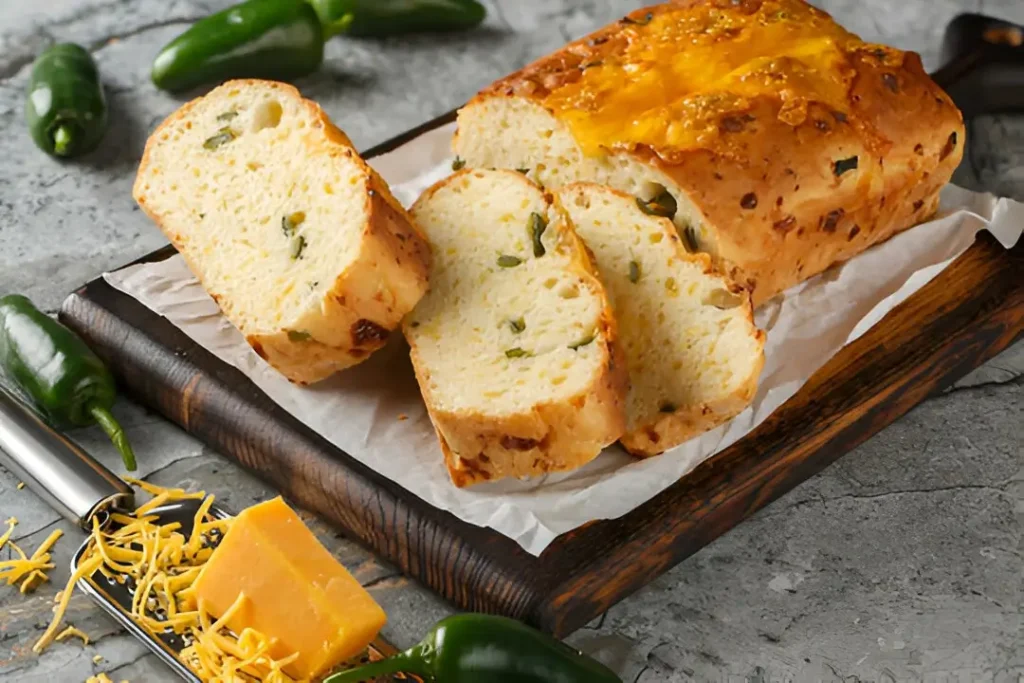
If you’re a fan of bread that’s soft, chewy, and packs a punch of flavor, then this Vegan Jalapeno Cheddar Artisan Bread recipe is about to become your new go-to. Not only is it completely vegan, but it’s got that perfect blend of spicy jalapenos and melty vegan cheddar cheese that’ll have you coming back for more.
This recipe is simple, bold, and bursting with flavor. It’s perfect for anyone who wants to try something new or if you’re just craving a loaf that’s a little more exciting than your typical store-bought bread.
Pair it with some olive oil for dipping, or make it the base for a killer sandwich. Trust me, once you try it, you’ll never look at plain old bread the same way again.
Why You’ll Love This Vegan Jalapeno Cheddar Artisan Bread Recipe
Here’s why this recipe is worth your time:
- Flavor explosion: The combination of spicy jalapenos and gooey vegan cheddar adds layers of flavor that’ll keep you coming back for more.
- No Fancy Equipment: Don’t need a Dutch oven. Don’t need a stand mixer. Just a bowl, a spoon, and your hands.
- Vegan-friendly: No eggs. No dairy here! This bread is completely plant-based, so it’s perfect for anyone on a vegan diet or just looking to cut back on animal products.
- Easy to make: While it may seem fancy, this bread is surprisingly simple. With just a few basic ingredients, you can make your own artisan bread at home.
- Versatile: It makes great sandwiches, dips well in sauces, or even stands alone as a flavorful snack.
- Endless Possibilities: Make it classic, go for jalapeno cheddar pull-apart bread, or even turn it into easy cheddar jalapeno biscuits.
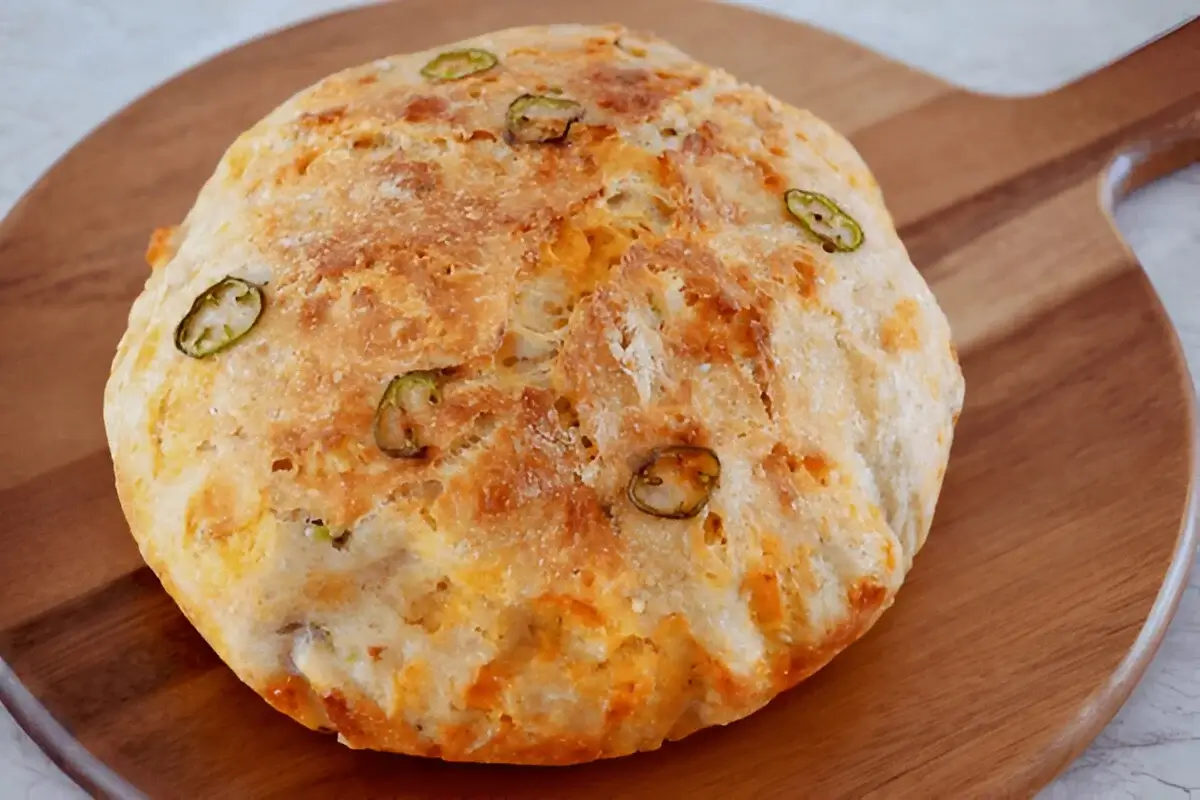
- Crispy Outside, Soft Inside: The dream texture. That golden crackle with a fluffy, cheesy, spicy middle.
Vegan Jalapeno Cheddar Artisan Bread Recipe
Ingredients You’ll Need
Before we get started, let’s gather all the ingredients. Trust me, the flavors in this bread will make you look like a baking pro. Here’s what you’ll need:
For the dough:
- 1 1/2 cups warm water (around 110°F)
- 2 tsp active dry yeast
- 1 tbsp sugar
- 2 tbsp olive oil (for a hint of richness)
- 1 1/2 tsp sea salt (enhances the flavor of the bread)
- 3 1/2 cups all-purpose flour
- 2 tbsp vital wheat gluten (helps make your bread chewy and stretchy)
For the jalapeno cheddar filling:
- 1 ½ cups vegan cheddar cheese, shredded
- 2 medium jalapeños, finely chopped (seeds in if you like it hot, out if you don’t)
- ½ teaspoon garlic powder (because garlic makes everything better)
- Pickled jalapeños (optional but adds a killer tang)
If you have dietary preferences or restrictions, don’t worry! You can easily make swaps. Gluten-free flour works perfectly for a gluten-free version, or you can use dairy-free cheese if you prefer.
How to Make This Delicious Vegan Jalapeno Cheddar Bread
Step 1: Activate the Yeast
The key to a fluffy loaf is getting your yeast all bubbly and frothy. Here’s how to do it right:
- In a small bowl, combine 1 1/2 cups of warm water with 2 tsp sugar. Give it a quick stir.
- Sprinkle in 2 tsp active dry yeast and let it sit for about 10 minutes. You’ll see the yeast start to foam and bubble up. This means it’s ready to roll!
Pro Tip: Make sure your water is warm (not too hot!), around 110°F, to activate the yeast. Too hot, and you’ll kill the yeast. Too cold, and it won’t activate.
Step 2: Mix the Dough
Now that your yeast is all ready, let’s get this dough going:
- In a large bowl, mix together 3 1/2 cups of flour, 2 tbsp vital wheat gluten, and 1 1/2 tsp sea salt.
- Pour in your foamy yeast mixture and 2 tbsp of olive oil into the dry ingredients.
- Stir everything together with a wooden spoon until it starts forming a sticky dough. It might get a little messy, but that’s the beauty of bread-making!
Pro Tip: Don’t worry if the dough is a little sticky. As you knead, it’ll start to come together. If it feels too sticky, sprinkle in a little extra flour—just don’t overdo it.
Step 3: Knead the Dough
Time to get your hands in there:
- Lightly flour your work surface and dump your dough onto it.
- Knead the dough for 8-10 minutes until it’s smooth and elastic. You’ll know it’s ready when it doesn’t stick to your hands or the counter anymore.
Pro Tip: If your dough feels too sticky, add small amounts of flour at a time. But don’t overdo it—this dough should still be soft and just a tad tacky. If it’s too dry, add a tiny splash of water.
Step 4: First Rise
This is where the dough gets all fluffy and delicious:
- Place the dough in a clean, lightly greased bowl and cover it with a damp towel or plastic wrap.
- Let it rise in a warm spot for about 1 hour, or until it’s doubled in size.
Pro Tip: If your kitchen is cold, you can place the dough in the oven with just the light on to keep it warm while it rises.
Step 5: Prepare the Filling
While your dough is rising, let’s work on the star of the show: the jalapeno cheddar filling. Here’s how:
- Finely chop 2 medium jalapenos. Remove the seeds if you prefer a milder flavor, but keeping them adds extra heat.
- finely chop the pickled jalapeños into circles.
- Shred 1 1/2 cups of vegan cheddar cheese. If you have a favorite brand of vegan cheese that melts well, now’s the time to use it!
Step 6: Incorporate the Fillings
Once your dough has doubled in size, it’s time to make it spicy and cheesy:
- Punch down the dough to release the air, then turn it out onto a lightly floured surface.
- Roll it out into a rough rectangle shape.
- Evenly sprinkle your jalapenos, pickled jalapenos, garlic powder. and shredded vegan cheddar across the dough.
- Fold the dough over the filling like you’re folding an envelope, and gently knead it so the filling is incorporated throughout.
Pro Tip: Don’t over-knead the dough after adding the filling. You want the cheese and jalapenos to stay chunky and not completely mixed into the dough.
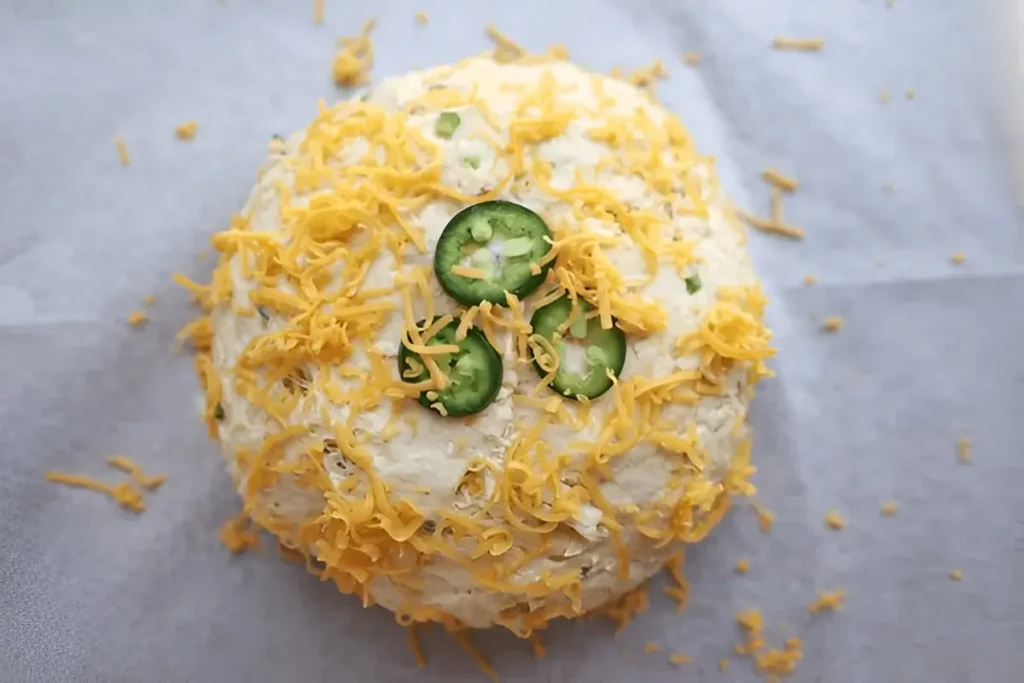
Step 7: Shape the Dough
Now that your dough is stuffed with that cheesy, spicy goodness, it’s time to shape it into an artisan loaf:
- Gently flatten the dough into a rough rectangle again.
- Carefully fold it into a round or oval shape, tucking in the sides as you go. The goal here is to get a nice, tight shape without squeezing out the filling.
- Once your loaf is shaped, place it on a parchment paper-lined baking sheet or in a greased bread pan (depending on the shape you prefer). Or if you’re feeling fancy, go with a loaf pan for that jalapeño cheddar bread in a loaf pan style.
Pro Tip: If you’re going for that rustic artisan look, just free-form the loaf without worrying too much about perfection. The beauty of artisan bread is in its imperfection!
Step 8: Second Rise
Now it’s time to let the dough rest and rise again. This second rise gives the bread its airy, fluffy texture:
- Cover the shaped dough loosely with a clean towel or plastic wrap.
- Let it rest for about 30 to 45 minutes, until it looks puffed up and ready to go.
Pro Tip: If you’re in a bit of a rush, you can pop the dough in a warm oven (just with the light on) for this rise. The warmth helps the dough rise faster.
Step 9: Preheat the Oven
While your dough is doing its thing, it’s a good idea to get your oven preheated:
- Preheat your oven to 375°F (190°C). This is the perfect temperature to get that beautiful golden crust without overbaking the inside.
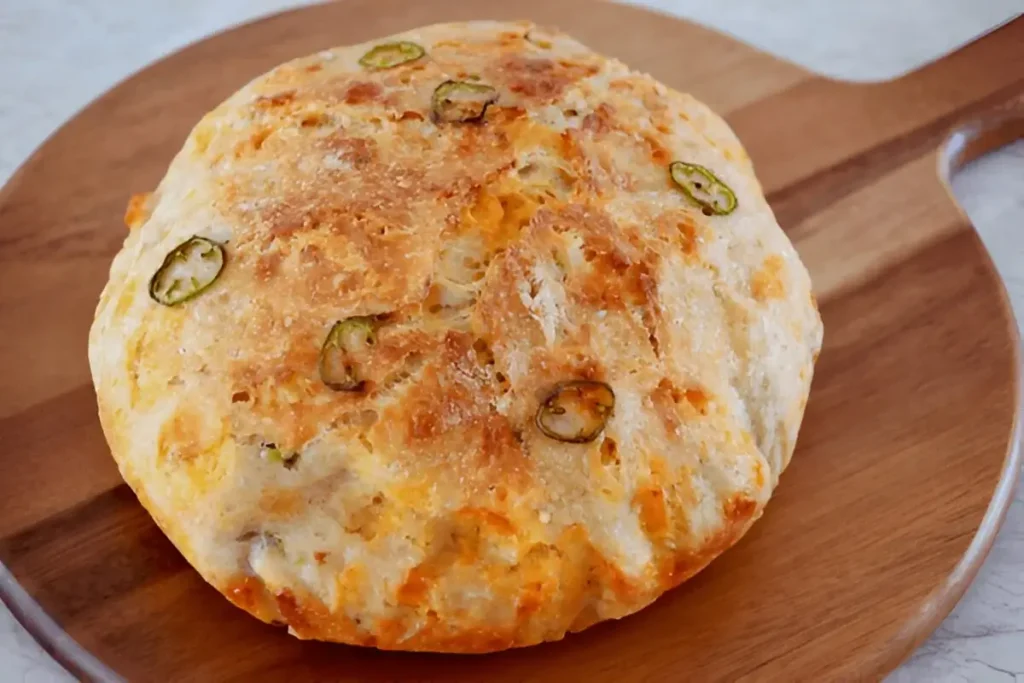
Step 10: Bake Your Bread
Once your dough is fully risen and your oven is preheated, it’s time to bake the bread to perfection:
- Before popping it in the oven, you can score the top of the loaf with a sharp knife. This isn’t necessary, but it gives the bread a gorgeous rustic look and allows it to expand while baking.
- Place the loaf in the preheated oven and bake for about 30 to 35 minutes, or until the top is golden brown and the bread sounds hollow when tapped on the bottom.
- If you want an extra crispy crust, you can add a cup of water to a baking dish in the bottom of the oven to create steam while baking. This will help the bread develop a lovely crunchy exterior.
Pro Tip: Check the bread around the 25-minute mark to make sure it’s not getting too dark. Every oven is a bit different, so keep an eye on it!
Step 11: Cool the Bread
Once your bread is done, take it out of the oven and let it cool:
- Let the bread cool for at least 15 to 20 minutes before slicing. I know it’s tempting to dive right in, but trust me, letting it cool helps set the crumb and prevents it from being too mushy inside.
Pro Tip: If you can’t wait and just have to slice it right away, that’s okay too! Just know that warm bread will be a little softer and can get a bit messy.
How to Serve Vegan Jalapeno Cheddar Artisan Bread
Once your bread has cooled and you’ve sliced it up, it’s time to enjoy it!
Dipping
Slice the bread into thick pieces and serve with olive oil, balsamic vinegar, or your favorite dipping sauce. The flavor of this bread will shine through, and the soft interior will soak up those tasty dips.
You can also dunk it in soup, because soup and bread are best friends. Or, slather it with vegan butter while it’s still warm.
Sandwiches
Make your next sandwich stand out by using slices of this bread as your base. Whether you’re layering it with fresh veggies, vegan deli meat, or a tasty spread, it’s the perfect sandwich bread.
Toast it up

Pop a slice in the toaster and spread some vegan butter or avocado on top for an easy, flavorful snack. Or, you can make jalapeno cheese stuffed bread by slicing it and stuffing it with even more vegan cheddar before baking.
Tips for Success
Here are a few pro tips to help you perfect this vegan jalapeno cheddar artisan bread recipe every time:
- Don’t skip the second rise! It’s crucial for developing that fluffy texture.
- If your bread isn’t rising as expected, make sure your yeast is fresh. Old yeast can cause bread to rise slowly or not at all.
- Make it pull-apart style by shaping into small rolls before baking
- Brush with olive oil before baking for a shinier crust
- For a softer crust, cover the bread with a towel while it cools
- Want to make the bread a bit spicier? Add more jalapenos to the filling, or even sprinkle some cayenne pepper into the dough for an extra kick.
- Make ahead: If you have leftover bread (unlikely, but you never know), wrap it tightly in plastic wrap or foil and store it at room temperature for up to 2 days. You can also freeze it for up to 3 months.
Nutritional Information
Wondering about the nutritional content of this mouthwatering vegan jalapeno cheddar artisan bread? Here’s a breakdown of what you can expect in each serving (approx. one slice of bread):
| Nutrient | Per Serving (1 Slice, approx. 1/12 of loaf) |
|---|---|
| Calories | 150 kcal |
| Total Fat | 5 g |
| – Saturated Fat | 0.5 g |
| – Trans Fat | 0 g |
| Cholesterol | 0 mg |
| Sodium | 300 mg |
| Total Carbohydrates | 22 g |
| – Dietary Fiber | 2 g |
| – Sugars | 1 g |
| Protein | 3 g |
| Vitamin A | 4% DV |
| Vitamin C | 15% DV |
| Calcium | 2% DV |
| Iron | 8% DV |
Notes:
- The nutritional information is based on a serving size of one slice (approx. 1/12 of the loaf).
- The percentages (%DV) are based on a standard 2,000-calorie daily diet.
- Adjustments may be needed based on ingredient substitutions (e.g., different types of vegan cheese).
This bread is perfect for anyone looking for a flavorful, satisfying snack without all the heaviness of traditional cheese breads.
Plus, the jalapenos bring a nice kick to every bite, while the vegan cheese keeps it completely dairy-free, giving your stomach a break from the usual dairy overload.
Substitutions and Variations
You don’t have to follow this recipe exactly to enjoy some delicious bread! Here are a few ideas if you want to switch it up or cater to dietary needs.
Flour Substitutions
Want to try something different? Go ahead and use whole wheat flour for a heartier texture, or even spelt flour for a slightly nuttier flavor. Just keep in mind the dough might be a little denser.
Gluten-free option? Swap the all-purpose flour for a gluten-free flour blend (make sure it’s designed for baking). You may need to tweak the liquid amounts since gluten-free flour can absorb more liquid.
Cheese Alternatives
If you don’t have vegan cheddar cheese on hand, use any plant-based cheese you love. A vegan mozzarella or smoked gouda could offer a unique twist, giving the bread a different but still incredible flavor.
You could even try cashew cheese or make your own vegan cheese sauce to drizzle in the dough!
For the Spicy Lovers
Want more heat? Add more jalapenos, or toss in some serrano peppers or habaneros for a fiery kick.
For a smoky flavor, try smoked paprika or add a bit of chipotle pepper powder.
For a Softer Bread
Try replacing some of the flour with oats or adding a little more fat, like coconut oil or vegan butter, to make your bread extra moist and tender.
Troubleshooting Tips
Baking can sometimes be a bit tricky, but don’t worry! Here are some tips to help you avoid common mistakes.
Dough Not Rising?
Check the freshness of your yeast! If it’s old, it might not work properly. Also, make sure the water or plant milk you’re using is warm, not hot. Too hot can kill the yeast, and too cold won’t activate it.
Dough Too Sticky or Dry?
If your dough is too sticky, try adding a little extra flour, one tablespoon at a time, until it’s tacky but manageable.
On the flip side, if it’s too dry and crumbly, add a bit more liquid (water or plant milk) until the dough comes together.
Over-Baked or Too Hard?
If your bread turns out too hard, it might’ve been in the oven too long. Keep an eye on it toward the end of baking to ensure you don’t over-bake.
Try covering it with foil for the last 10 minutes to prevent the crust from getting too crunchy and dry.
Storage Tips and Shelf Life
This vegan jalapeno cheddar artisan bread doesn’t last long because it’s so good, but here are some tips to keep it fresh for as long as possible.
How to Store
Keep the bread in an airtight container or wrap it tightly in plastic wrap and foil to keep it soft. It will stay fresh for about 3-4 days at room temperature.
Freezing the Bread
Don’t plan to finish the entire loaf? Freeze the slices! Place the cooled slices in a freezer-safe bag and freeze for up to 3 months. When you’re ready to eat, just pop them in the toaster or oven for a quick reheat.
Reheating for Freshness
To bring the bread back to its freshly-baked glory, reheat slices in a toaster oven for a crispy, warm result. You can also wrap the loaf in foil and heat it in a conventional oven at 350°F for about 10 minutes.
Serving Ideas and Pairings
Here are a few ways to serve your vegan jalapeno cheddar artisan bread that will elevate your meal:
Slice the bread thin, toast it, and top with tomato, basil, and a drizzle of olive oil for a quick snack or appetizer.
With Vegan Dips
Pair this spicy, cheesy bread with a vegan guacamole, salsa, or even a tangy vegan sour cream. The rich, creamy dips balance out the heat from the jalapenos, creating the perfect bite.
Soup and Chili Pairings
This bread is the perfect companion to any kind of vegan chili or a hearty lentil soup. The bread is sturdy enough to dip but light enough to not overpower the meal.
Sandwich Idea
Try turning this bread into a savory sandwich. Layer with vegan deli meats, some crispy lettuce, and avocado for a complete meal.
More Bread Obsession Inspirations?
Check out these other must-try recipes:
- Easy Cheddar Jalapeno Biscuits – for a buttery, flaky alternative
- Amish Jalapeno Cheese Bread – for that classic old-school flavor
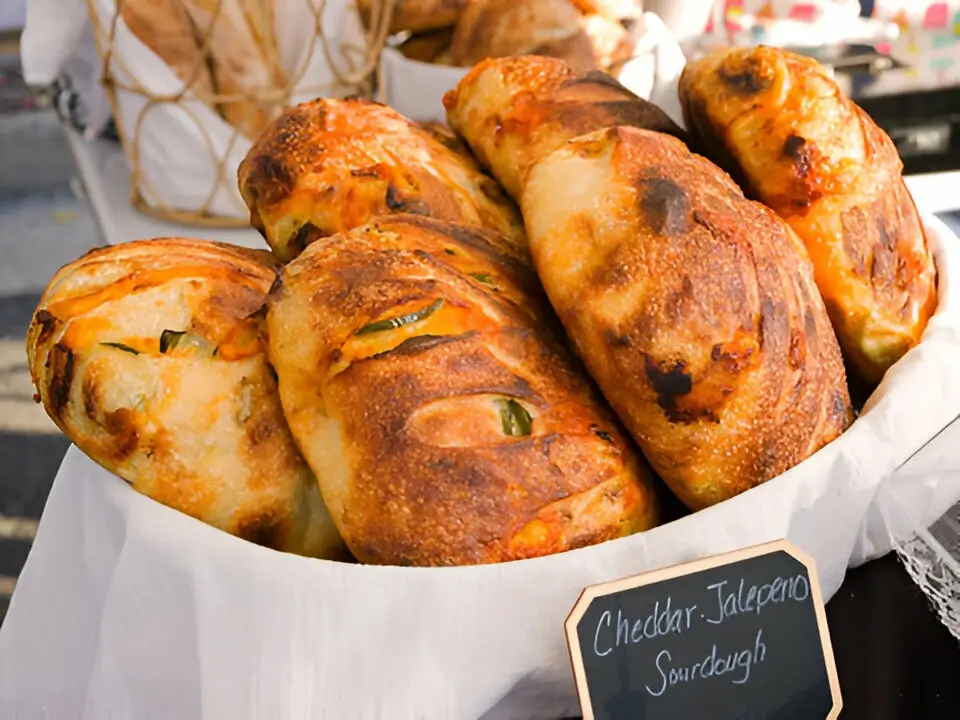
- Vegan Sourdough Bread – for another artisanal classic
Let me know how your loaf turns out! Drop a comment with your tweaks, pics, or just to say this bread changed my life.
Vegan Jalapeno Cheddar Artisan Bread Recipe
Ingredients
For the dough:
- 1 ½ cups warm water around 110°F
- 2 tsp active dry yeast
- 1 tbsp sugar
- 2 tbsp olive oil for a hint of richness
- 1 ½ tsp sea salt enhances the flavor of the bread
- 3 ½ cups all-purpose flour
- 2 tbsp vital wheat gluten helps make your bread chewy and stretchy
For the jalapeno cheddar filling:
- 1 ½ cups vegan cheddar cheese shredded
- 2 medium jalapeños finely chopped (seeds in if you like it hot, out if you don’t)
- ½ teaspoon garlic powder because garlic makes everything better
- Pickled jalapeños optional but adds a killer tang
- If you have dietary preferences or restrictions don’t worry! You can easily make swaps. Gluten-free flour works perfectly for a gluten-free version, or you can use dairy-free cheese if you prefer.
Instructions
Step 1: Activate the Yeast
- The key to a fluffy loaf is getting your yeast all bubbly and frothy. Here’s how to do it right:
- In a small bowl, combine 1 ½ cups of warm water with 2 tsp sugar. Give it a quick stir.
- Sprinkle in 2 tsp active dry yeast and let it sit for about 10 minutes. You’ll see the yeast start to foam and bubble up. This means it’s ready to roll!Pro Tip: Make sure your water is warm (not too hot!), around 110°F, to activate the yeast. Too hot, and you’ll kill the yeast. Too cold, and it won’t activate.
- Now that your yeast is all ready, let’s get this dough going:
- In a large bowl, mix together 3 1½ cups of flour, 2 tbsp vital wheat gluten, and 1 ½ tsp sea salt.
- Pour in your foamy yeast mixture and 2 tbsp of olive oil into the dry ingredients.
- Stir everything together with a wooden spoon until it starts forming a sticky dough. It might get a little messy, but that’s the beauty of bread-making!Pro Tip: Don’t worry if the dough is a little sticky. As you knead, it’ll start to come together. If it feels too sticky, sprinkle in a little extra flour—just don’t overdo it.
Step 3: Knead the Dough
- Time to get your hands in there:
- Lightly flour your work surface and dump your dough onto it.
- Knead the dough for 8-10 minutes until it’s smooth and elastic. You’ll know it’s ready when it doesn’t stick to your hands or the counter anymore.Pro Tip: If your dough feels too sticky, add small amounts of flour at a time. But don’t overdo it—this dough should still be soft and just a tad tacky. If it’s too dry, add a tiny splash of water.
Step 4: First Rise
- This is where the dough gets all fluffy and delicious:
- Place the dough in a clean, lightly greased bowl and cover it with a damp towel or plastic wrap.
- Let it rise in a warm spot for about 1 hour, or until it’s doubled in size.Pro Tip: If your kitchen is cold, you can place the dough in the oven with just the light on to keep it warm while it rises.
Step 5: Prepare the Filling
- While your dough is rising, let’s work on the star of the show: the jalapeno cheddar filling. Here’s how:
- Finely chop 2 medium jalapenos. Remove the seeds if you prefer a milder flavor, but keeping them adds extra heat.
- finely chop the pickled jalapeños into circles.
- Shred 1 ½ cups of vegan cheddar cheese. If you have a favorite brand of vegan cheese that melts well, now’s the time to use it!
Step 6: Incorporate the Fillings
- Once your dough has doubled in size, it’s time to make it spicy and cheesy:
- Punch down the dough to release the air, then turn it out onto a lightly floured surface.
- Roll it out into a rough rectangle shape.
- Evenly sprinkle your jalapenos, pickled jalapenos, garlic powder. and shredded vegan cheddar across the dough.
- Fold the dough over the filling like you’re folding an envelope, and gently knead it so the filling is incorporated throughout.Pro Tip: Don’t over-knead the dough after adding the filling. You want the cheese and jalapenos to stay chunky and not completely mixed into the dough.
Step 7: Shape the Dough
- Now that your dough is stuffed with that cheesy, spicy goodness, it’s time to shape it into an artisan loaf:
- Gently flatten the dough into a rough rectangle again.
- Carefully fold it into a round or oval shape, tucking in the sides as you go. The goal here is to get a nice, tight shape without squeezing out the filling.
- Once your loaf is shaped, place it on a parchment paper-lined baking sheet or in a greased bread pan (depending on the shape you prefer). Or if you’re feeling fancy, go with a loaf pan for that jalapeño cheddar bread in a loaf pan style.Pro Tip: If you’re going for that rustic artisan look, just free-form the loaf without worrying too much about perfection. The beauty of artisan bread is in its imperfection!
Step 8: Second Rise
- Now it’s time to let the dough rest and rise again. This second rise gives the bread its airy, fluffy texture:
- Cover the shaped dough loosely with a clean towel or plastic wrap.
- Let it rest for about 30 to 45 minutes, until it looks puffed up and ready to go.Pro Tip: If you’re in a bit of a rush, you can pop the dough in a warm oven (just with the light on) for this rise. The warmth helps the dough rise faster.
Step 9: Preheat the Oven
- While your dough is doing its thing, it’s a good idea to get your oven preheated:
- Preheat your oven to 375°F (190°C). This is the perfect temperature to get that beautiful golden crust without overbaking the inside.
Step 10: Bake Your Bread
- Once your dough is fully risen and your oven is preheated, it’s time to bake the bread to perfection:
- Before popping it in the oven, you can score the top of the loaf with a sharp knife. This isn’t necessary, but it gives the bread a gorgeous rustic look and allows it to expand while baking.
- Place the loaf in the preheated oven and bake for about 30 to 35 minutes, or until the top is golden brown and the bread sounds hollow when tapped on the bottom.
- If you want an extra crispy crust, you can add a cup of water to a baking dish in the bottom of the oven to create steam while baking. This will help the bread develop a lovely crunchy exterior.Pro Tip: Check the bread around the 25-minute mark to make sure it’s not getting too dark. Every oven is a bit different, so keep an eye on it!
Step 11: Cool the Bread
- Once your bread is done, take it out of the oven and let it cool:
- Let the bread cool for at least 15 to 20 minutes before slicing. I know it’s tempting to dive right in, but trust me, letting it cool helps set the crumb and prevents it from being too mushy inside.Pro Tip: If you can’t wait and just have to slice it right away, that’s okay too! Just know that warm bread will be a little softer and can get a bit messy.
FAQs About Vegan Jalapeno Cheddar Artisan Bread
Can I make this bread gluten-free?
Yes! You can substitute the all-purpose flour with a gluten-free flour blend and still get a great result. Just make sure you’re using gluten-free flour that’s designed for bread-making, and consider adding a bit more vital wheat gluten if needed.
Can I use different types of cheese?
Definitely! While vegan cheddar works great for this recipe, you can experiment with different vegan cheeses, like vegan mozzarella or vegan pepper jack. Just make sure it’s a variety that melts well.
What if I don’t have vegan cheese?
Try nutritional yeast for a cheesy flavor or make a cashew cheese spread to layer in.
Can I add other spices to the dough?
Absolutely! This recipe is a blank canvas for all sorts of flavor additions. Try adding garlic powder, onion powder, or even fresh herbs like cilantro or thyme for an extra pop of flavor.
Can I Make This Bread Without a Stand Mixer?
Yep, absolutely! You can knead the dough by hand. Just be patient, and knead for about 8-10 minutes until the dough is smooth and elastic.
Do I need a Dutch oven?
Nope. This jalapeño cheddar bread no Dutch oven version is baked right on a sheet pan or in a loaf pan.
Can I Freeze the Dough?
Yes! If you want to bake this later, freeze the dough after the first rise. When you’re ready to bake, let it thaw overnight in the fridge and then proceed with the second rise and baking.
Can I Add More Vegetables to the Dough?
For sure! Adding roasted garlic, red bell peppers, or even some sautéed onions can give the bread a unique flavor. Just be sure to drain any excess moisture from the veggies to prevent the dough from becoming too wet.
Can I use pre-sliced jalapeños?
Yep. Fresh or pickled both work. Pickled adds tang. Fresh adds heat.
Conclusion: A Flavorful Twist on Traditional Bread
This Vegan Jalapeno Cheddar Artisan Bread recipe is the perfect blend of comfort and creativity. It’s the kind of bread that’s soft and fluffy on the inside, with a kick of spice and cheesiness on the outside. Whether you’re after jalapeno cheddar pull-apart bread, jalapeno cheese stuffed bread, or just the best darn loaf of your life—you got this.
So what are you waiting for? Grab those ingredients, preheat your oven, and start baking this flavor-packed loaf today. You won’t regret it!